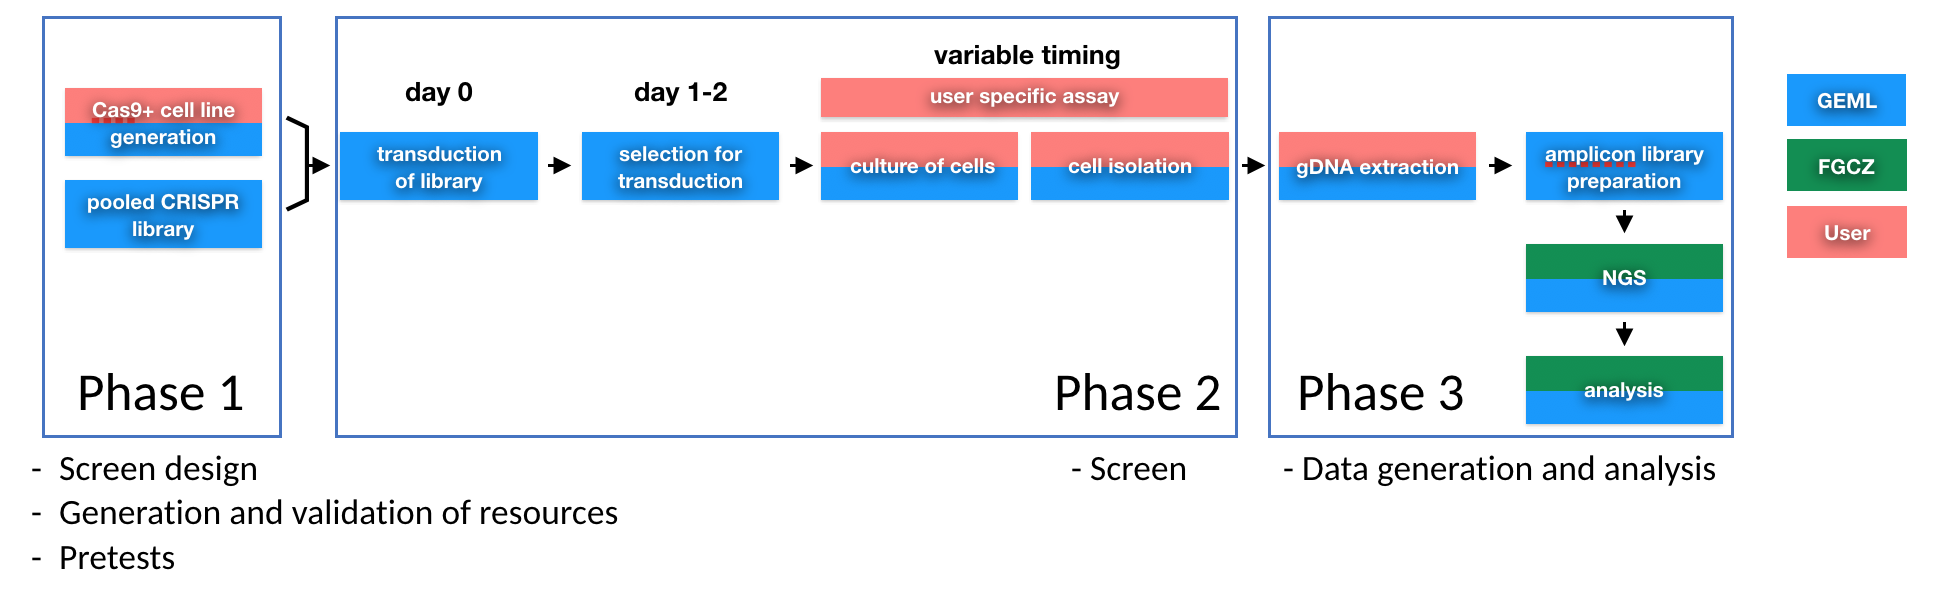
CRISPR Screen Workflow
How does a typical pooled CRISPR screen look like?
For operational purposes a screen is divided into three distinct phases:
Phase 1: This is probably the most important part of the screen. The strategy is being layed down, reagents and resources such as cell lines and CRISPR libraries are being generated and validated. Smaller scale experiments (pretests) allow the optimization of the screening method and the final adjustments of the screening parameters.
Phase 2: This is where the actual screen takes place. Due to the large number of reagents and resources commited during this period and the limited flexibility for pausing the workflow, everything needs to be ready from Phase 1.
Phase 3: After sample collection and processing, data is being generated and analysed by NGS and bioinformatic analysis. Already available or custom tools can be used for these analyses.
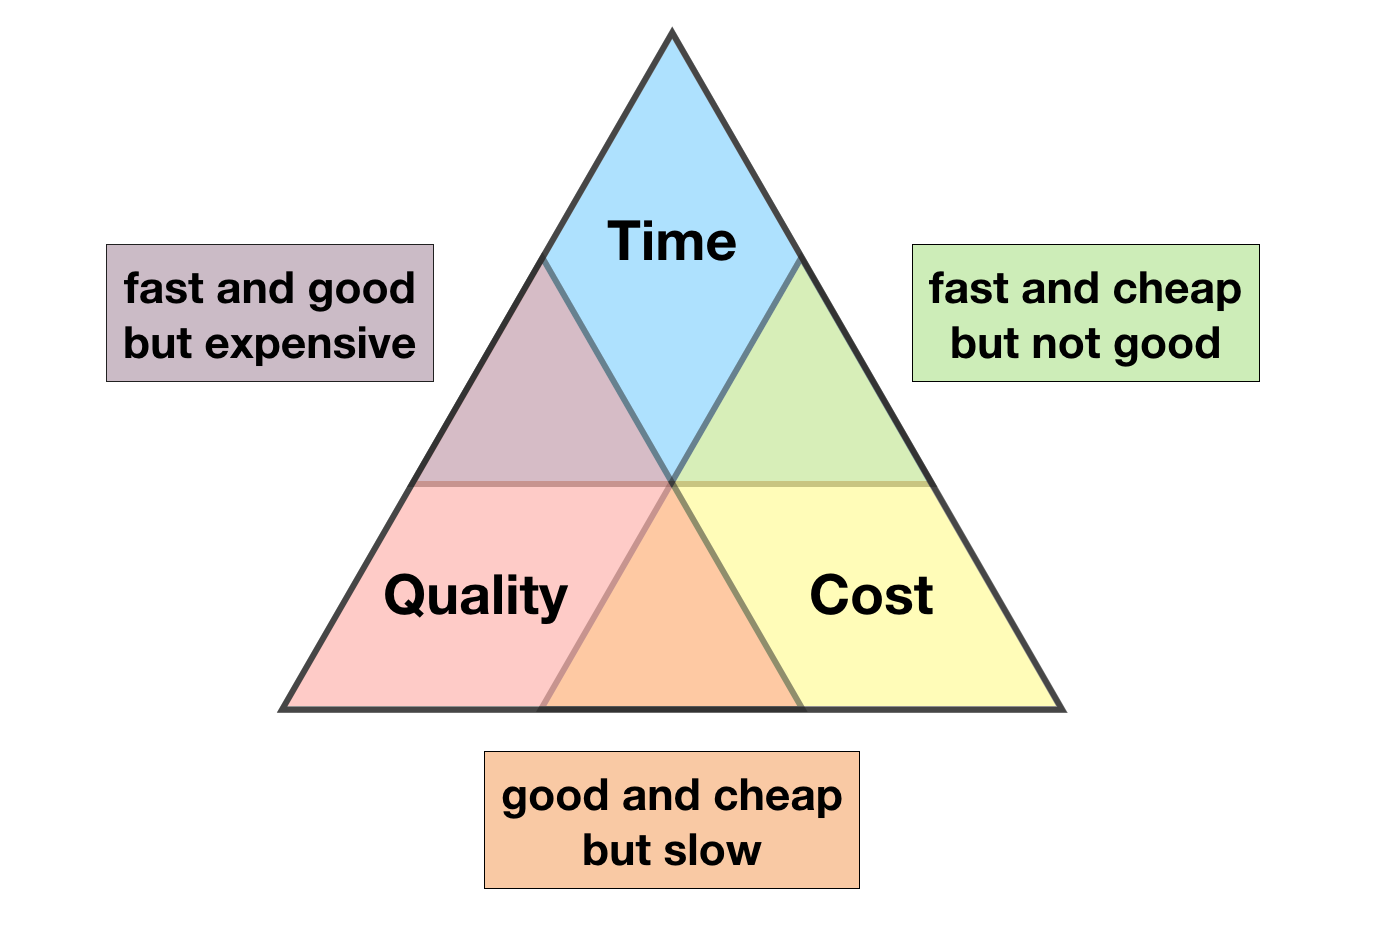
Just don’t forget; like any project, a screen is subjected to the triple constrain
Examples of considerations for a screen:
- Library type
- Library size
- cell model
- # of biological replicates
- sample selection/isolation method (user assay)
- Sequencing parameters (e.g. depth, length)
We know that a Screening project may sound intriguing but also intimidating at the same time. GEML has thus partnered with ETH technology platforms to build Screening@ETH, a team of experts in various types and parts of Screening projects. We can help you design, plan, execute, and analyse a Screen. Check out our webpage for more information.